Symptoms
When adding certain video clips to your VideoStudio library, you may receive an error pop up stating "file format mismatch" error with the directory path highlighted in square brackets, as in the image below.
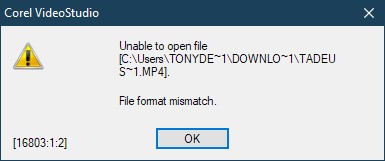
When you receive this error, you will not be able to add your video clip.
Cause
The reason for this mainly is that the video clip is in a format that is not supported by the program. For instance, when you inspect the details of the video file (using a tool like MediaInfo) you may find out that the bit-depth is 10-bit.
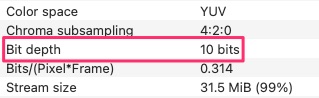
As VideoStudio does not have proper support for 10-bit video at this time, it will not accept the format.
Resolution
Since your video clip in its current format is not supported, what you can do is convert the video clip to a more mainstream format. In our example, a 10-bit video clip can be downsampled to the lower bit-depth (8-bit), which is the widely used color depth for most consumer-grade applications.
XMedia Recode conversion utility
You can convert your unsupported video clip using a third-party app called XMedia Recode , which is a popular audio and video transcoding tool that features a drag-and-drop style interface, and uses job queueing and batch processing to convert multiple files at once.
Note: Corel offers no support for XMedia Recode as it is a third-party program. Any difficulties you encounter using the program outside the instructions provided in this article will need to be brought up with XMedia support (E-Mail: mailto:info@xmedia-recode.de) for assistance.
Where to download XMedia Recode
XMedia Recode is a free and open-source program. You can download it from here.
Warning: As this is an executable file, your browser will prompt you that it is not safe. As this is a popular program from a trusted developer, you may go ahead and allow your browser to proceed with the download.
Converting your video clip
Once you have downloaded and installed the program, simply launch it, add your mp4 video clip. Follow the steps below.
- To add your clip, click 'Open File' in the toolbar. You can select and add multiple files at once.
You can also drag and drop your video clips into the program window directly and they will be automatically added to the list. You cannot drag and drop folders, however.
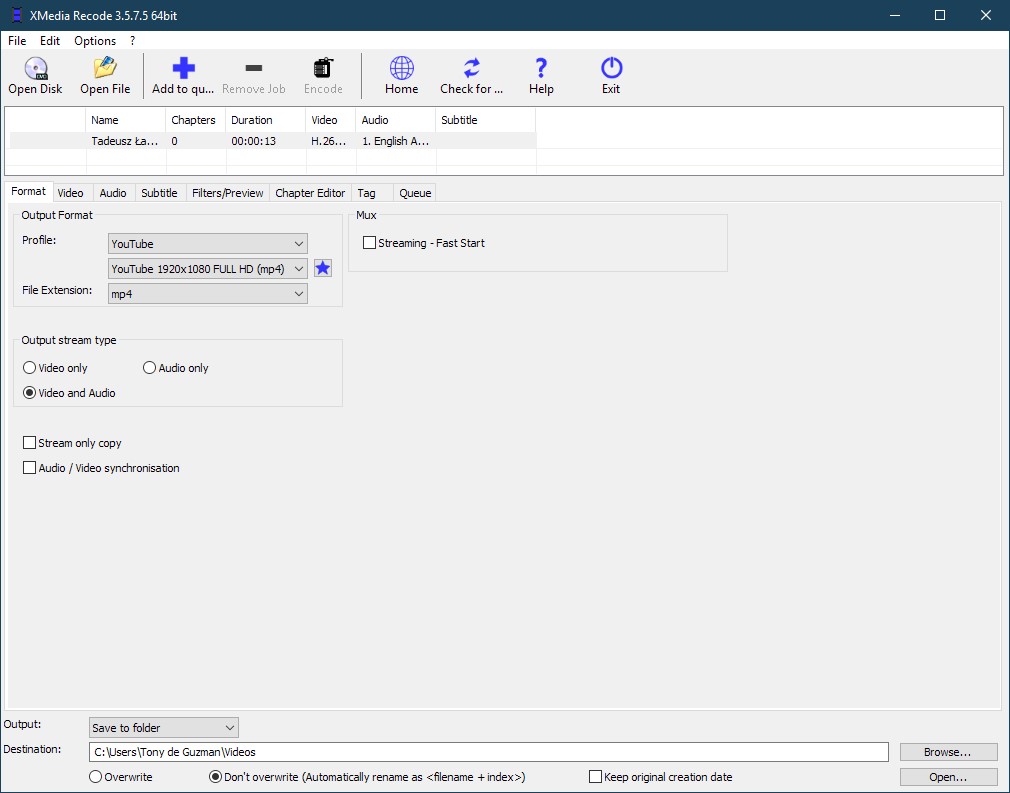
- In the Format tab, click on the Profile drop-down list and select "YouTube", and below that "YouTube 1920x1080 FULL HD (mp4).
- For file extension, select "mp4", not that you have any other choice.
Note: This is not the only format that works. We only select the YouTube format as it is the more popular format. You can experiment with other formats too, if you choose so. - Make sure "Video and Audio" is selected in the "Output stream type" box.
- At the bottom of the window, make sure "Save to folder" is selected for Output.
- Browse to the destination folder of your choosing for the Destination.
- Now, from the list of clips you added select the one you want to convert by clicking on it (CTRL + click if selecting multiple files).
- Once selected, click on the "Add to queue" button on the toolbar.
- You will notice that the "Encode" button has become active - click on it to start the conversion.
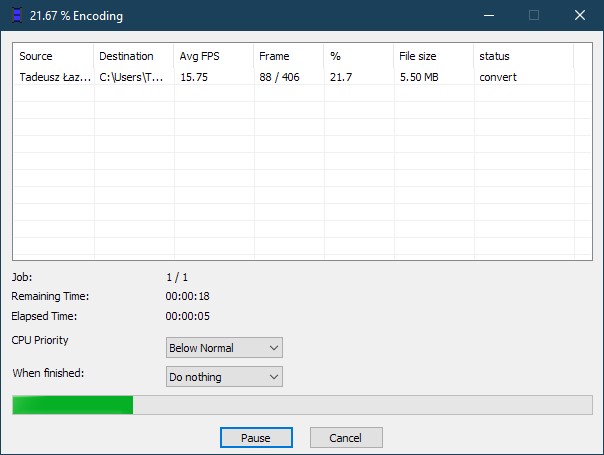
- Once completed, you will be notified that creation of the media file was successfull.
You can now add the converted video to your VideoStudio library without receiving the "File format mismatch" error.
Note that you may notice a slight degradation of quality in the converted video clip, mostly in the color aspect. This is normal, since the color quality has gone from 10-bit to 8-bit color depth as a result of the conversion.
Was this article helpful?
Tell us how we can improve it.