Here's the Step by Step Procedures on How to Import WorkSpace in CorelDraw X6.
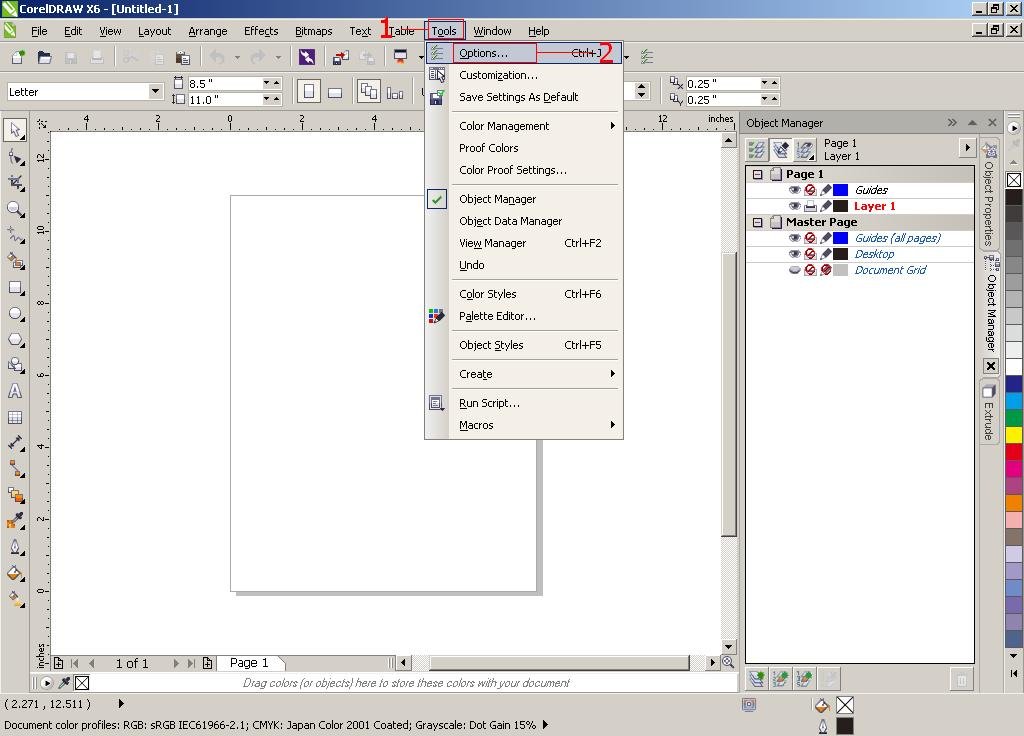
1. Click Tools Menu.
2. Select Options...
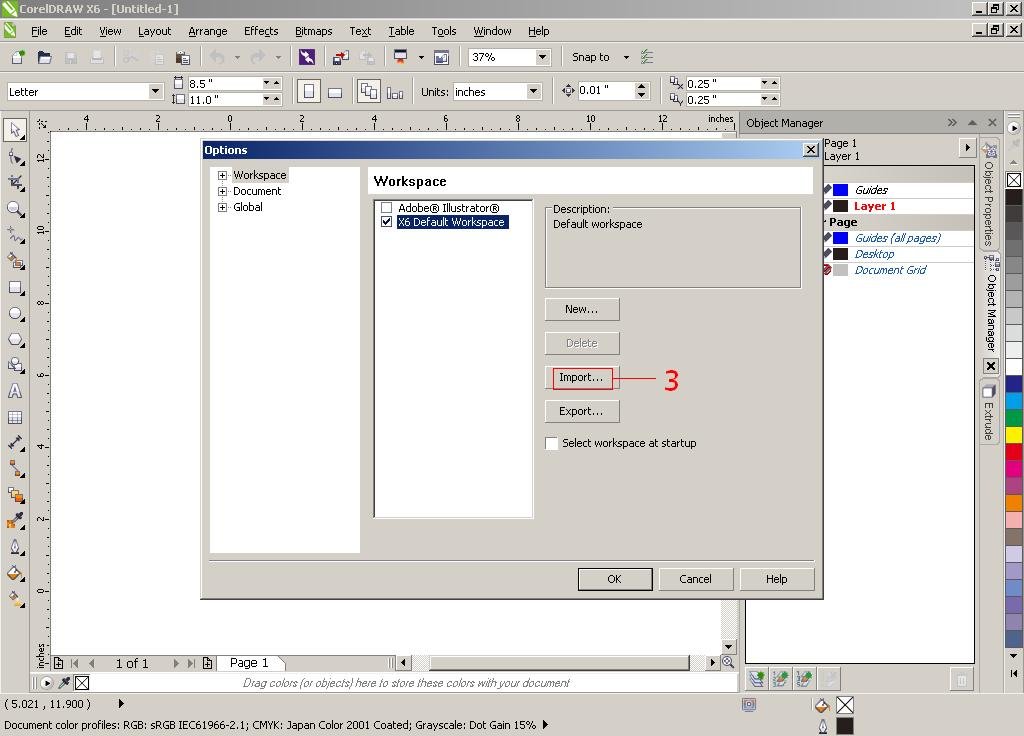
The options Window will appear.
3. Click the Import Button.
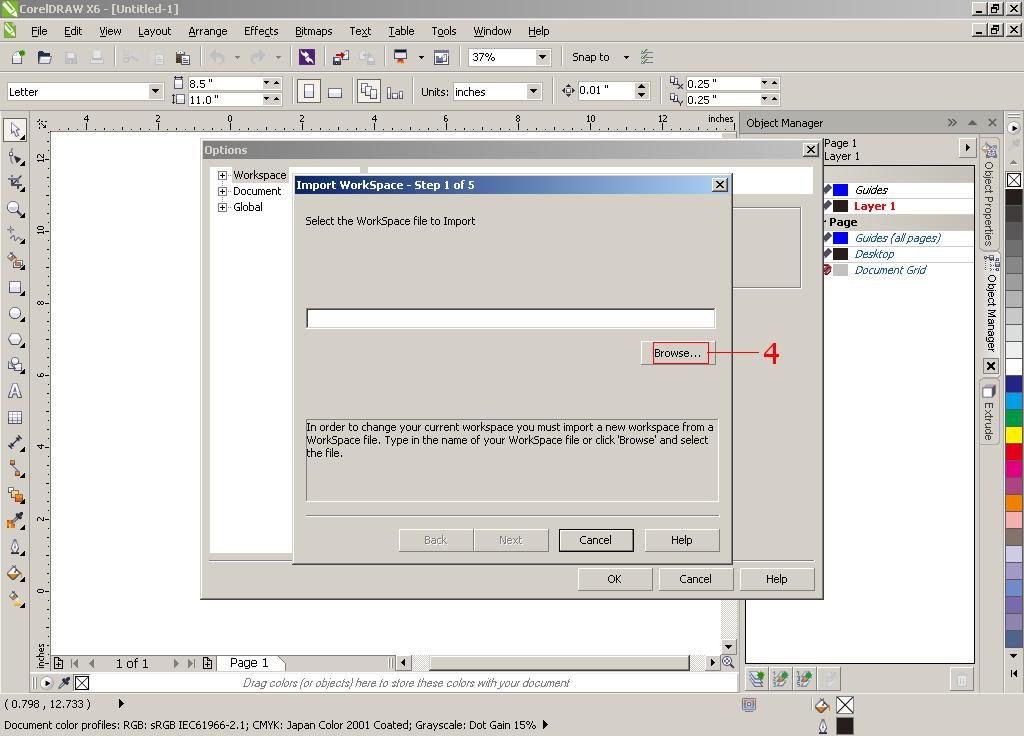
4. Click the Browse Button, And look for the WorkSpace File that you have saved.
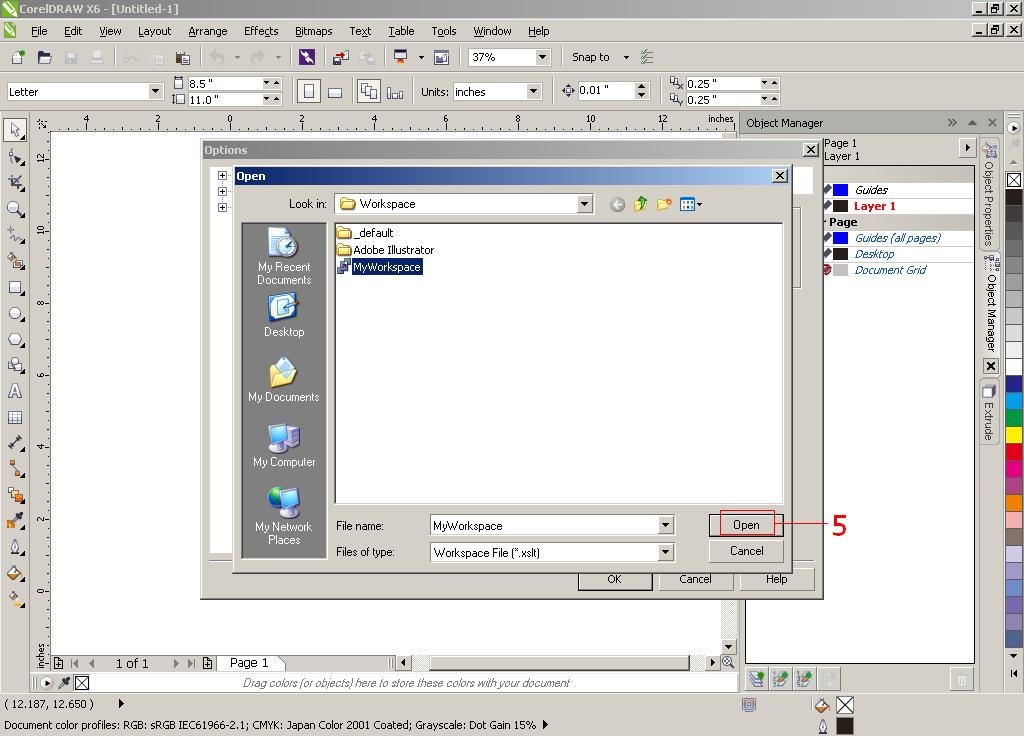
5. Once that you have located the file. Click it and Click the Open Button.
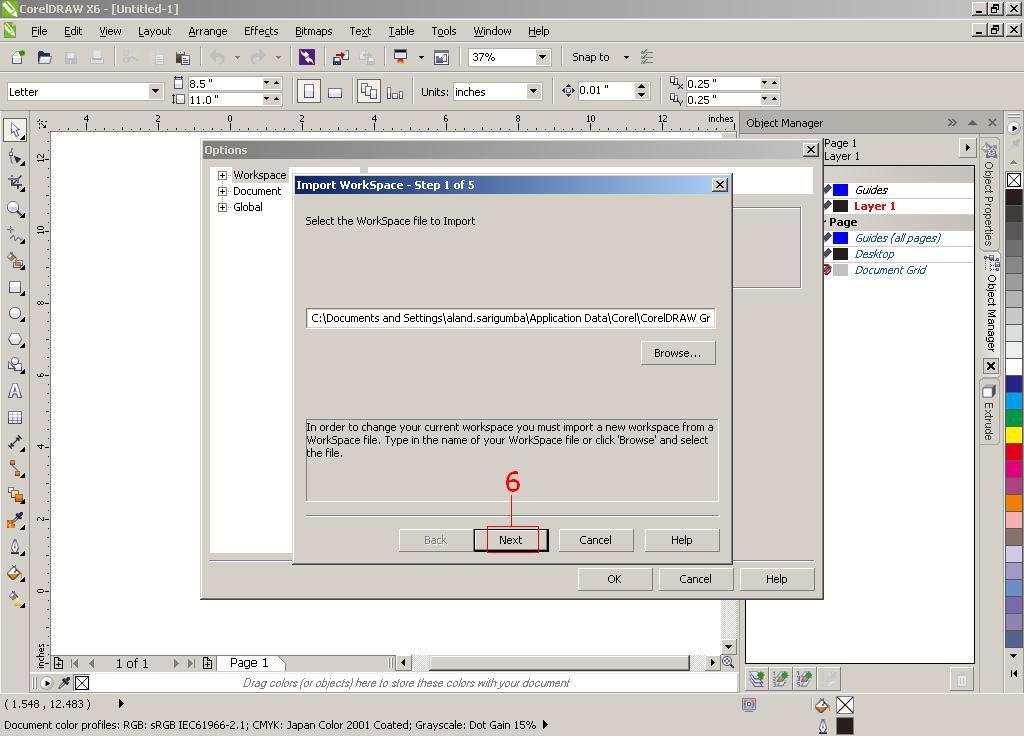
6. You may now Click the Next Button.
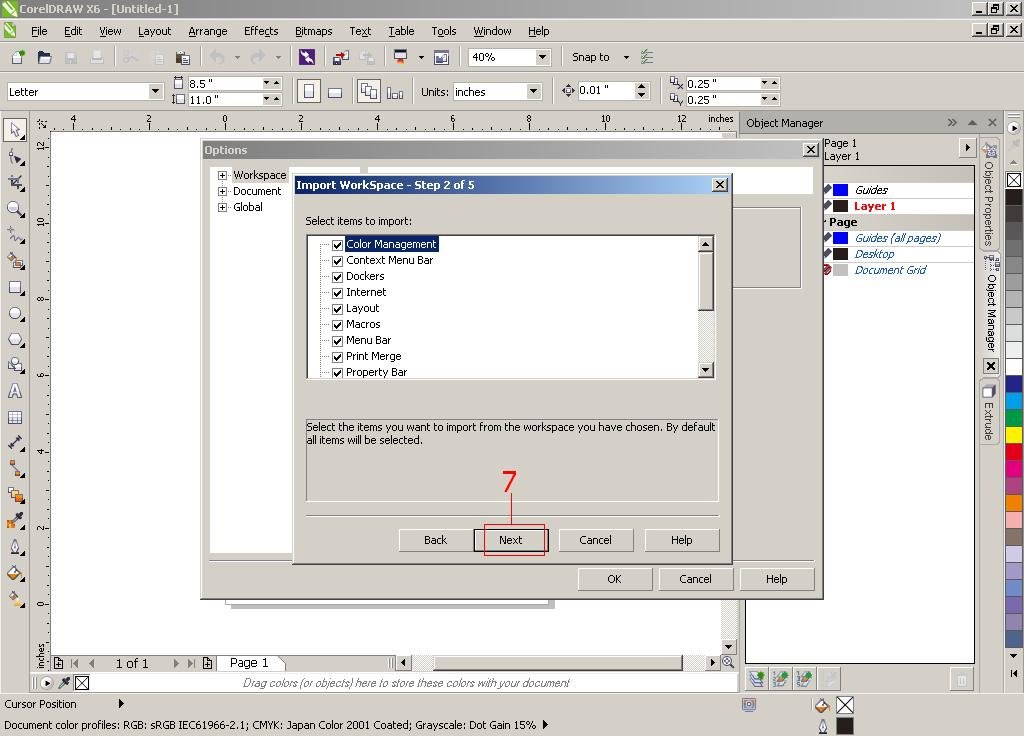
7. On the next option, Please Make sure that all Boxes are checked. And then Click the Next Button again.
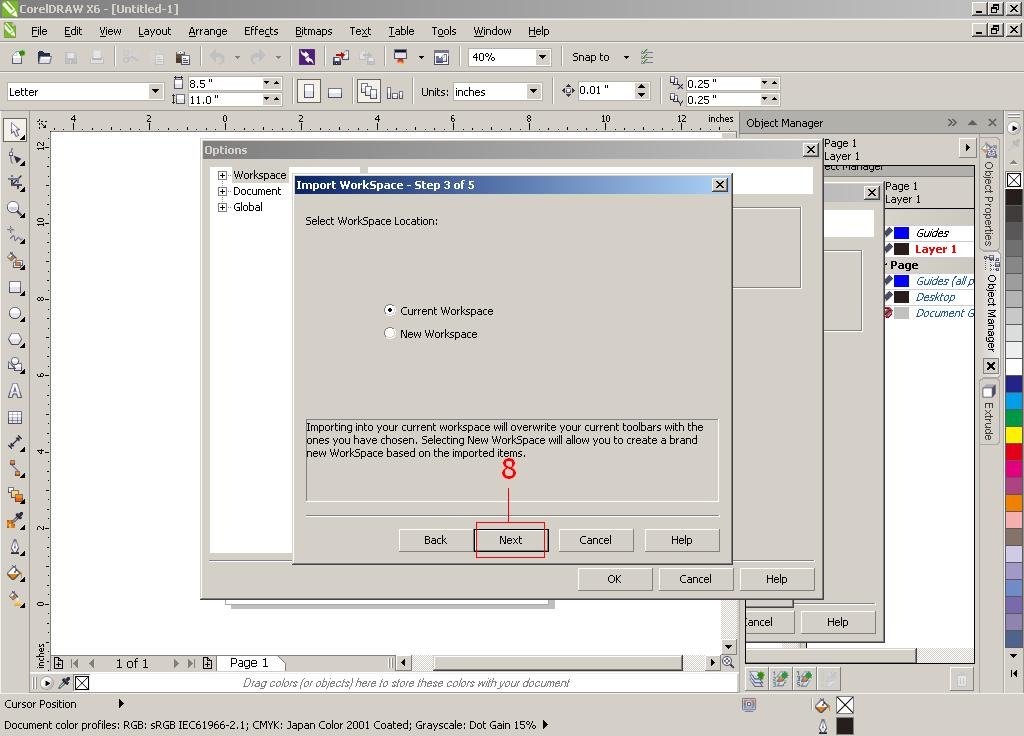
8. You will have an Option to Select "Current WorkSpace or New WorkSpace" Current WorkSpace will Overwrite the Current WorkSpace Settings that you have. Click the Next Button.
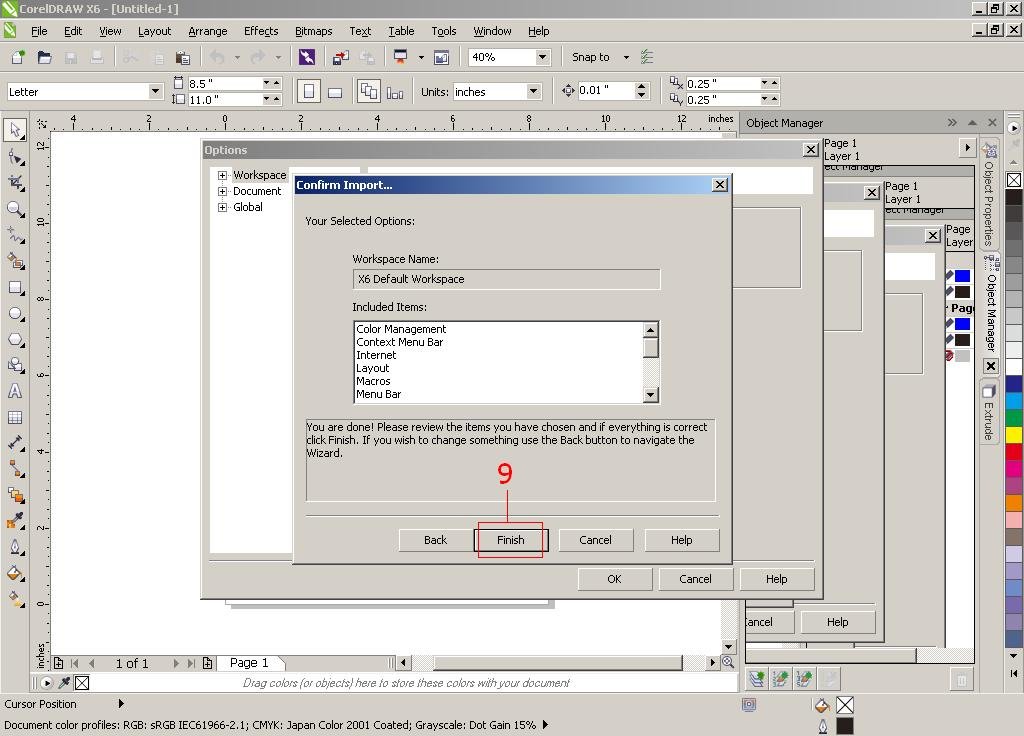
9. Click Finish to Apply and Import your WorkSpace.
Was this article helpful?
Tell us how we can improve it.