One mark of a professionally created photo is depth of field - a blending of in-focus and out-of-focus areas that is usually produced with fancy lenses and special camera settings. In the past, creating depth of field in your digital photos required a long, tricky process. Now, however, Corel® Paint Shop Pro® Photo XI lets you create this professional look in only a few minutes.
What you'll need
- Corel® PaintShop Pro® Photo XI
- Sample image PSPPXI_03.jpg (download)
When you complete this tutorial, you'll be able to
- Use the Organizer to open a photo
- Add depth of field to your photos
Open the photo
- 1. Download the PSPPXI_03 image, and save it in your My Pictures folder.
- 2. Once you have the image saved, begin typing the file name PSPPXI_03 in the search box at the top of the Organizer. Your collection of image files is automatically filtered.
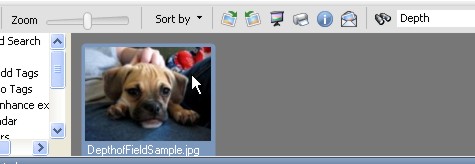
- 3. Once you find the sample image, double-click the photo to open it in the workspace.
Open the Depth of Field Dialog Box
- 4. On the Learning Center palette, click Adjust, and then click Advanced Adjustments. Next, click Depth of Field.The Depth of Field dialog box appears.


-
5. At the top of the dialog box, you'll see the original photo (Before) and the photo with the depth of field applied (After).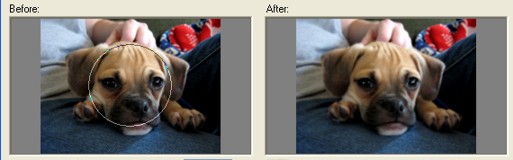
Select Your Area of Focus
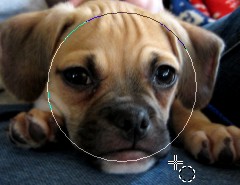
- 6. In the Area of focus section of the dialog box, click the Circular Selection Tool button.

- 7. In the Before pane, click between the puppy's eyes, right above his nose. Drag to create a circle that just touches the inside of his ears and is right below his mouth.

Set Blur & Aperture Shape
- 8. Now, you need to adjust the Blur slider. For this example, we set the Blur control at 18. The higher you set the control, the blurrier your background will be.
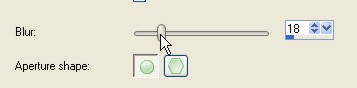
- 9. In the Aperture shape section, click the Circular Aperture Shape button.
Adjust Area of Focus
- 10.. In the Area of focus section of the dialog box, choose the following settings:
-
Feather Edge: 25
- Focus Range: 0
-
Note: The Feather Edge control makes the transition between the edge of the selected area and the nonselected area gradual and smooth. The Focus Range control increases or decreases the size of your selection.

- 11. Click OK.
-
Feather Edge: 25
Next steps
Amaze your friends with this fancy look. Corel Paint Shop Pro Photo XI makes it so easy to add depth of field to your photos. Try using what you've learned here on pictures of flowers. You'll be surprised by how great your photo looks.
Was this article helpful?
Tell us how we can improve it.