Sometimes, the only way to deal with recurring error messages and strange crashes, is to completely remove Creator NXT and reinstall it. In most cases, though, a simple uninstall and reinstall will not change the situation. What needs to be done is to start on a clean slate. That is, to remove the application and then completely clean out all remnants of the previous installation.
Note: This procedure can be used with all versions Roxio Creator NXT.
There are three parts to this procedure. To wit:
- Uninstalling the main application and its content pack;
- Deleting leftover files and registry keys;
- Downloading and reinstalling the application and content pack.
Uninstalling the application
Before proceeding, make sure you are signed in to an administrator account. Now, uninstall your Creator NXT version, and any other Roxio programs installed on the computer. One thing to keep in mind is that if you already own a version of Creator NXT, there is no need to install any other Roxio software (e.g., Easy CD & DVD Burning), as this all-in-one software suite incorporates all the functions of the other Roxio applications.
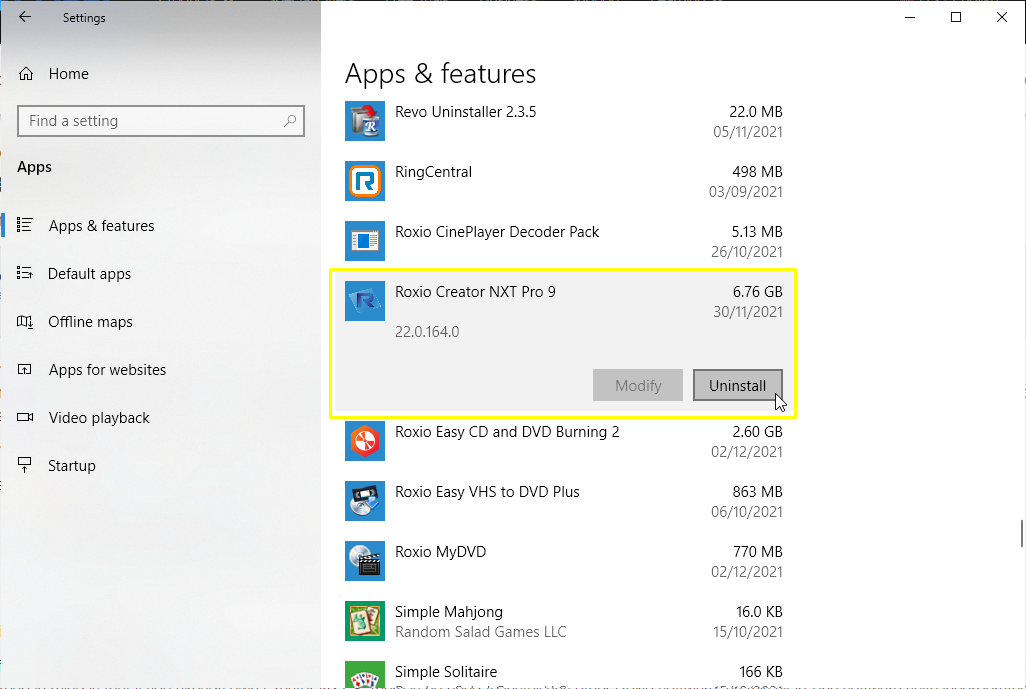
Uninstall your Roxio applications by going to the Windows Start ![]() button, then Settings > Apps > Apps & Features. Select your Roxio Creator application, then click on the Uninstall button and follow the on-screen prompts to complete the procedure.
button, then Settings > Apps > Apps & Features. Select your Roxio Creator application, then click on the Uninstall button and follow the on-screen prompts to complete the procedure.

Once done, reboot the computer then proceed to the next section.
Deleting leftovers
After signing back in to Windows after the reboot, start deleting all residual files and folders from the locations shown below.
Note: The steps to follow have been formatted in such a way as to eliminate any confusion. Pay special attention to text with asterisks and bolded text. Delete only the folders (and contained files) in bolded text. Do not delete the folders marked with asterisks (*).
Files and folders
When you are ready to dive in, open File Explorer and make sure that it is configured to show hidden files and folders, as well as file name extensions. If you do not know how to do this, please refer to this KB article: How to configure Windows to show file extensions and hidden files. What the folder/subfolder is used for is described in italics.
Now, delete the folders listed below, indicated in bold text.
1. C:\*Program Files
A) Roxio. Contains the Roxio Burn folder with various dll files.
2. C:\*Program Files (x86)
A) *Common Files
i. PX Storage Engine. Contains various PX library (.dll) and executable files.
ii. Roxio Shared. Contains other Library folders and files.
iii. Sonic Shared. Contains PX device driver files
B) Roxio. Contains BackOnTrack and Roxio Burn folders.
C) Roxio Creator NXT Pro (version number). Contains various Creator NXT application folders.
3. C:\*ProgramData
A) FLEXnet. This is the Roxio Update Manager. Contains application files and folders.
B) Roxio. Various Roxio application folders and some files.
C) Roxio Log Files. Contains installation log folders.
D) Sonic. Contains license files.
4. C:\*Users
A) *User account name (your user sign-in name) folder
i. *AppData
1. *Local
a) *Corel
i. MyDVDApp.exe_Url_wg4k2…. Contains user configuration files
b) Corel_Corporation. Contains Roxio app configuration files.
c) Roxio
i. Roxio Burn folder
d) RoxioChromeCache. Contains web browser cached files, but usually empty
e) RoxioFireFoxCache. Contains web browser cached files, but usually empty
f) RoxioIE11Cache. Contains web browser cached files, but usually empty
g) RoxioIECache. Contains web browser cached files, but usually empty
h) *Temp. Contains temporary files that can be safely discarded if the application using them is no longer running. NOTE: Delete the contents only, not the folder itself. You won’t be able to delete files that are currently in use. If you get a Folder access denied or File in use message, simply click the “Skip” button.
2. *Roaming
a) Corel Corporation. Roxio application folders
b) FLEXnet. Update manager files.
c) Roxio. Creator NXT application folders
d) Roxio Burn. Application folders.
e) Roxio Log Files. Roxio installation log folders for older NXT versions.
NOTE: If you do not find all of the folders listed above, do not worry about it. This only means those folders were already removed by the Uninstall wizard. You may proceed to the next section.
Registry keys
The next step is to delete residual Roxio keys from the Windows Registry using the Windows Registry Editor.
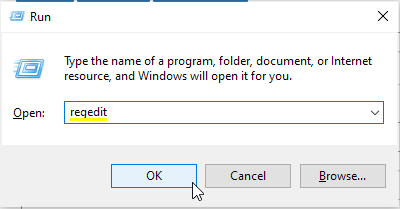
1. Launch the Registry Editor by pressing the Windows key ![]() in combination with the “R” key on your keyboard. This will bring up the Run command window.
in combination with the “R” key on your keyboard. This will bring up the Run command window.
a) Type in “Regedit”, without the quotes, and click on the “Ok” button, or hit “Enter” on your keyboard.

Note: You will find the Windows key in between the Ctrl and Alt or Spacebar keys on the bottom row of your keyboard

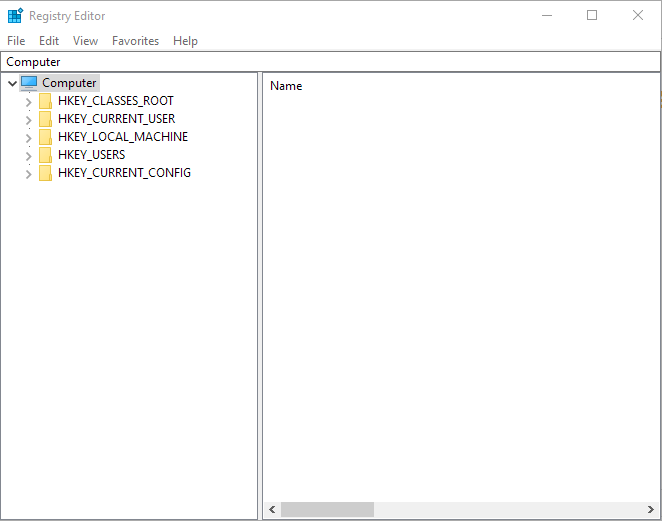
2. In the Registry Editor window, Click on File > Export,
a) Select a folder location you can easily remember, and enter a name for your exported Registry file
b) Click the “Save” button.
Note: This will serve as your Registry backup file. In case you will need to revert to your old Registry, you simply need to double-click on the backup file to restore your Registry to its original state before making the changes.
3. Double-click the “HKEY_CURRENT_USER” hive
a) Double-click the “Software” key. Delete the following sub-keys:
i. FLEXnet
ii. Roxio
iii. Sonic
4. Double-click the “HKEY_LOCAL_MACHINE” hive
a) Double-click the “Software” key. Delete the following sub-keys:
i. FLEXnet
ii. Roxio
iii. Sonic
b) Double-click on the “WOW6432Node” sub-key, and delete the following:
- i. FLEXnet
ii. Roxio
iii. Sonic
5. Double-click the “HKEY_USERS” hive
a) Double-click on the “.DEFAULT” key
i. Double-click on the “Software” sub-key, and delete the following:
1. FLEXnet
2. Roxio
3. Sonic
b) Double-click on the “S-1-5-18” key
i. Double-click on the “Software” sub-key, and delete the following:
1. FLEXnet
2. Roxio
3. Sonic
c) Perform the same procedure for the “S-1-5-19”, “S-1-5-20”, and “S-1-5-21” keys
6. Exit out of the Registry Editor.
Note: Again, if you do not find any of the keys or sub-keys listed above, do not worry about it. It means they have already been removed by the previous uninstall procedure.
Reinstalling Creator NXT
At this point, please ensure your antivirus protection and firewall are disabled. Please refer to the respective software’s Help documentation for guidance or contact the respective support teams for assistance. Now, go ahead and re-install your Creator NXT software. If you no longer have a copy of your Creator NXT installer, you can download a copy here.
Remember to reboot your system before using the software.
Re-enable all your security software after Creator NXT has been successfully installed.
Was this article helpful?
Tell us how we can improve it.