
Welcome to this tutorial on saving images with transparent areas in PaintShop Pro.

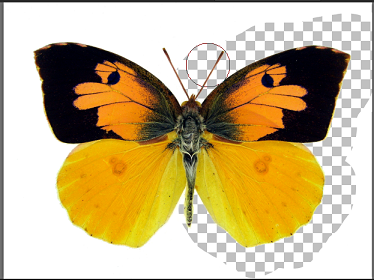
In this demonstration, we will show you how to remove areas of an image by making the areas transparent with the Background Eraser tool. This is an extremely useful photo-editing technique that can be used to make collages, website banners or even overlay tracks in video projects.
1. To start, open the image you want to make transparent in PaintShop Pro and make sure that the Edit workspace is active.

2. Next, from the Tools toolbar, select the Background Eraser tool from the fly-out with the Eraser tool.

3. You can always make the Background Eraser tool smaller or larger, as needed, by adjusting the values in the Size box in the Tool Options palette at the top of the screen. Alternatively, you can hold down the''''ALT key and drag in the image window to resize your brush.

4. Click the background once to sample the area and then erase by holding down the left mouse button and dragging the eraser tip in the middle of the pointer on the area you want to delete. Remember to make sure that the outer circle overlaps the area that you want to keep. It's also a good idea to erase a little bit at a time, so you don't lose all your work if you have to undo a mistake.

5. When the background has been completely removed click File and then select Save As.
It's always good to save a copy to the .PSPimage file format so you can go back and edit the image later without losing any image quality.
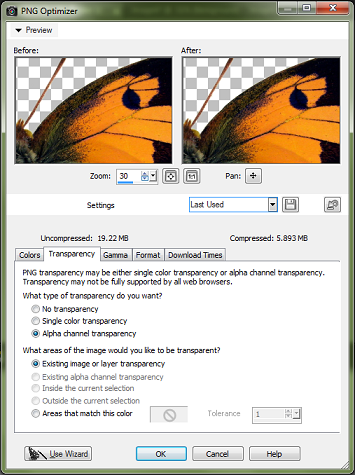
6. For exporting, there are two well-known file types that support transparency, GIF and PNG. PNGs have some advantages over GIF files when it comes to photos, so we'll use it in this example. From the File menu, choose' Export and then PNG Optimizer.

7. From the Transparency tab, select Alpha Channel Transparency and then check the Preview. You can zoom out if need be, to make sure that the background shows a checkerboard pattern (which represents transparency) on both the Before and After images, and then click OK and Save.

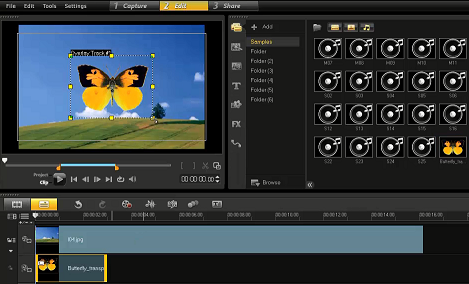
In this example, I removed the background from an image with the Background Eraser tool and saved the image with the transparent areas as a PNG file that can be used in other projects. Now the image can be used in a variety of creative projects. For example, you can import the image into VideoStudio and use it as an Object Overlay.

If you have enjoyed this tutorial, be sure to check out the other tutorials that are available in the Discovery Center. If you have any ideas for tutorials or projects that you would like to see in the future, e-mail Discovery.Center@corel.com.
Was this article helpful?
Tell us how we can improve it.