Tutorial by: Ken McMahon, author of PaintShop Pro X4 for Photographers
Website: http://www.gopaintshoppro.co.uk
In this step by step tutorial I'll show you how to acheive a natural looking result using PaintShop Pro X4′s much improved HDR Exposure Merge feature.
Whatever you think of HDR, it looks like it's here to stay. A lot of people are put off by the aggressive tone mapping that's used in many HDR images, rendering the scene more like a painting or illustration than a conventional photo. That's given HDR a bit of a bad name and led a lot of people to assume that it's good for nothing. Not so. HDR, or High Dynamic Range images are a really useful way to capture the full range of tones in a scene, particularly when that range is beyond what the camera sensor is capable of recording in a single exposure.
Before we get started, if you're using an older version of PaintShop Pro, the new HDR Exposure Merge in PaintShop Pro X4 (it replaces HDR photo merge in X3) is a big improvement on earlier versions and well worth upgrading for.
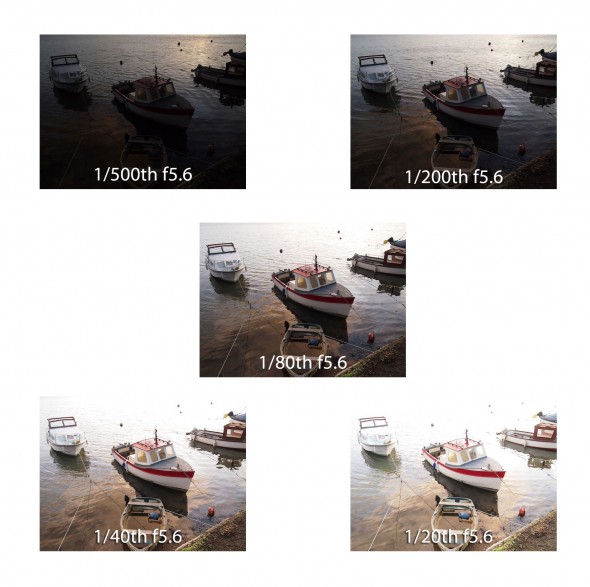
The basis of HDR is that you combine several shots taken at different exposure settings, so first a word about that. You'll need to shoot at least two bracketed exposures a stop apart, I'd recommend you shoot at least three and, if you have the patience, five won't do any harm. Some cameras have a continuous shooting mode that will do this automatically for you. If not, choose aperture priorit exposure mode and manually bracket with one correctly exposed frame and for at +1, +2, -1 and -2 EV. e.g. if the correct exposure is 1/500th at f8 shoot four additional frames also at f8 but with shutter speeds of 1/250th, 1/125th, 1/1000 and 1/200th. The reason you change the shutter speed and not the aperture is to maintain the same depth of field in each frame. Finally, it helps a great deal if you put the camera on a tripod, or rest it somewhere steady, and HDR works best with fairly static subjects.
Here's what your five bracketed shots should look like
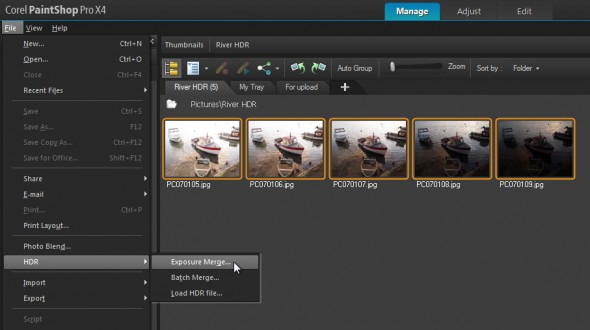
Import your five frames into PaintShop Pro X4, select them in the Manage workspace and choose File>HDR>Exposure merge.
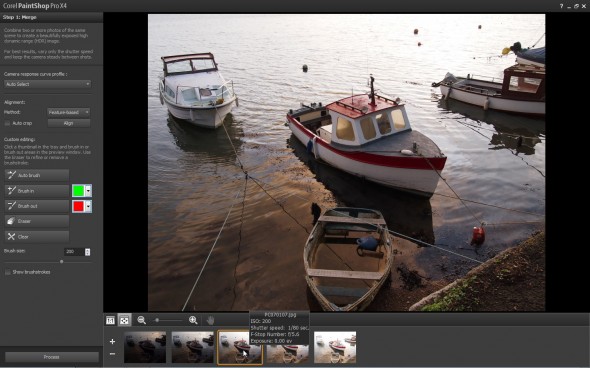
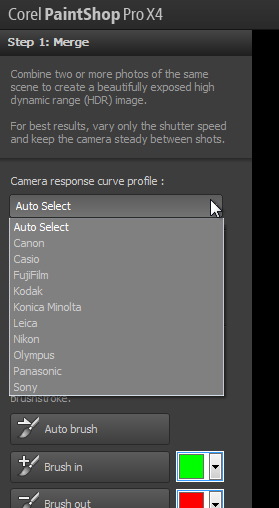
The merge window has a number of options the first of which is the Camera Response Curve Profile. I'm a little sceptical of this as it lists manufacturers, rather than individual models and seems to make little difference to the end result, but you're welcome to give it a try if your camera manufacturer is listed, otherwise just leave it on the default Auto Select.
The next section on the Merge Settings window is for alignment, if you shot using a tripod you won't need this, but for hand-held shots you can experiment with edge-based or feature-based alignment to see which produces the best results. Ignore the Custom editing tools for now, I'll come back to those a little later. Just head straight to the bottom and click the Process button.
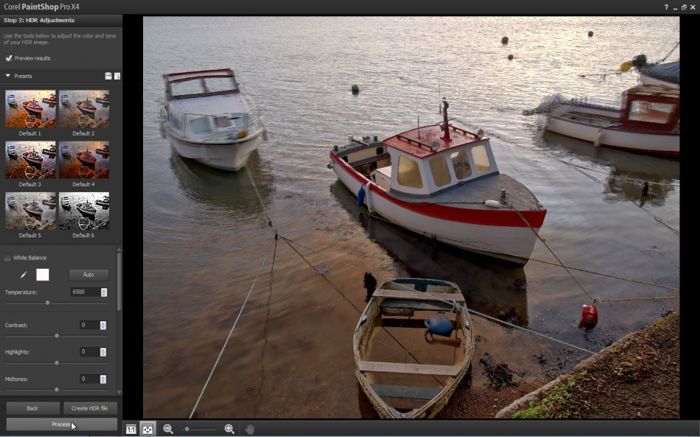
You'll now see the HDR composited image previewed in the Adjustments window. This is the result using the default settings, you can choose from one of six presets to apply a range of adjustments to alter the white balance, saturation and Tone mapping. It's the last of these that determines how the tones in the original frames are combined and how the vast range of tones in a 32-bit floating point HDR image are mapped to more limited tonal range in a 16 bit per channel integer file.
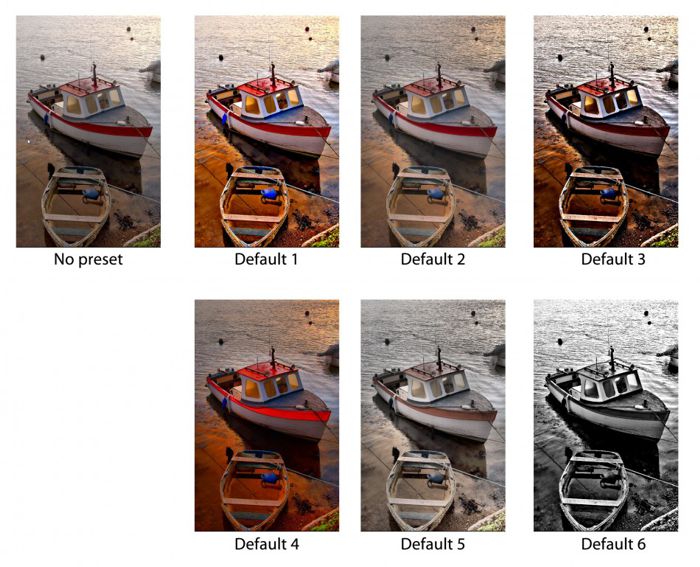
Check out some of these presets. I actually think the default result provides a good balance in terms of tonal reproduction, white balance and colour saturation. But if you prefer a slightly more stylized look the Default 1 preset is where it's at. If default 1 is a little too much for you, the Default 2 preset is less full-on. Default 3 is like Default 1, but with darker midtones and shadows and less vibrant colours. The remaining presets provide variations with, among other things, varying saturation or vibrancy.
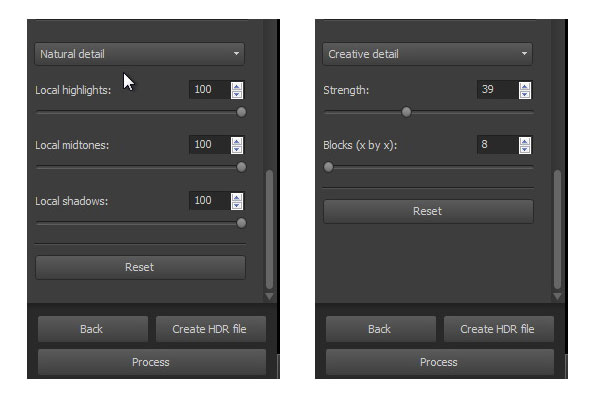
The other thing that differs between the presets and that's worth experimenting with is the last pulldown menu which provides two options, Natural detail with three sliders for adjusting local tone mapping in the shadows, midtones and highlights and Creative details with sliders for strength and block size. You can reset things back to the initial processed settings by clicking the reset button at the bottom of the adjustments pane. And, once you've found a combination of settings that works for you, you can save it as a preset of your own by clicking the disk icon at the top of the panel.
Once you've got the HDR image looking the way you want it you can click the ‘Create HDR file' button. This doesn't create an image file but saves the HDR settings so that you can reopen and continue editing later. Unless you want to do that, click the Process button to apply your settings.
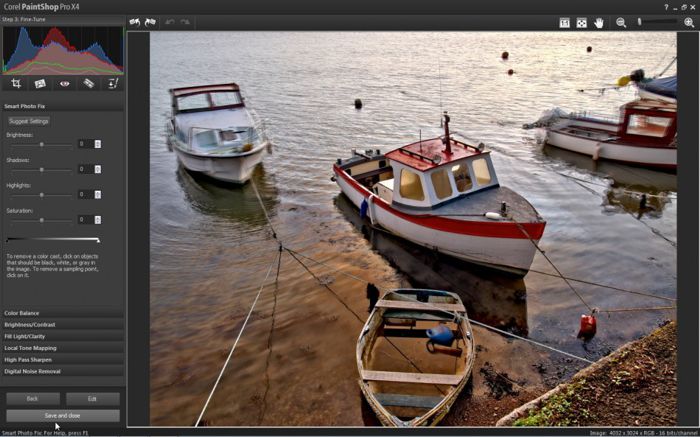
The Fine tune window allows you to do just that, make minor changes to tone and colour as well as remove noise from the image and apply sharpening. When you're happy with how everything looks click the save and close button and choose the .pspimage format to save the file as a 16-bit per channel RGB image.
It's looking good, but we're not quite done yet. You don't have to look too hard to see that there's a problem with this HDR composite image. The boats on the left and right of the frame have moved between exposures and caused ‘ghosting' in the final composited result. This is one of the big problems that you'll frequently encounter when shooting HDR, you can avoid camera movement by using a tripod, but people, water, vehicles, and even trees have a habit of moving around and there's not much you can do about it. Or is there?
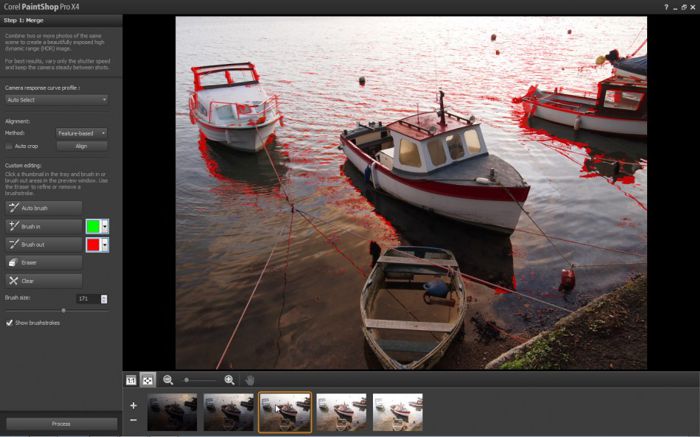
Lets go back to the Merge screen in HDR Exposure Merge (click the Back button twice). Under custom editing you'll see a selection of tools for holding back and forcing parts of the image in each exposure. The Auto brush tool is worth a try, though I've had limited success with it. It analyses each frame to determine what parts of the subject have moved between exposures then brushes them out. Give it a try and see how it works for you. If nothing else it can guide you to where the problems might be. Click the Auto brush button and after a few seconds you'll see the problem areas painted in red on each frame. Now click the process button to create the HDR Exposure Merge using those settings.
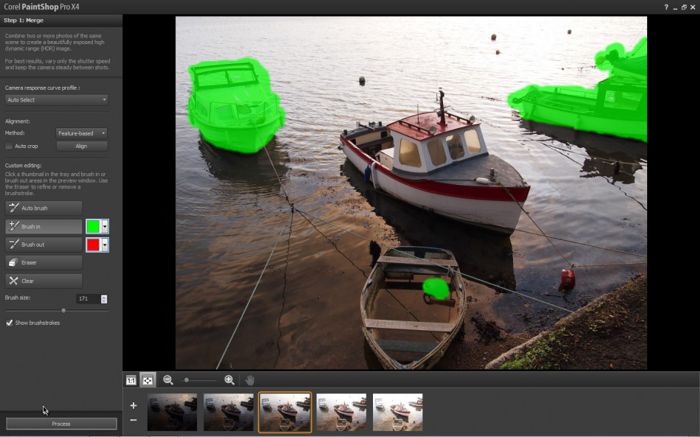
If you don't like what you see click the Back button and this time use the Brush out brush to manually paint out the problem areas. You'll have to decide how many of the frames you need to apply the brush out to, but it's probably best to assume your subject has moved and is in a different place on every one of them, so brush out the offending detail on all but the middle exposure. A far quicker and easier way to do this is to use the Brush in tool and paint the same areas on the exposure that you want to use. Here (above) I've brushed in the two boats on the centre (correct) exposure and this automatically brushes out those same areas on all the other frames.
The disadvantage is that you won't get any HDR goodness in the brushed in/out areas because only pixel data from a single exposure is used. You can use the Eraser to remove any accidentally applied brush in/out paint.
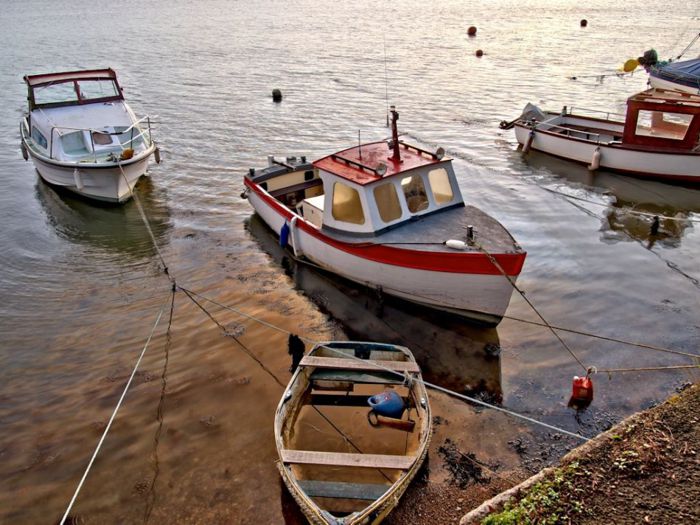
Here's the result with both of the boats brushed in on the centre (correctly exposed) frame.

Was this article helpful?
Tell us how we can improve it.