This Guide is intended for WinZip for Windows 8. It describes the necessary initial steps, including installing WinZip, and provides a first look at using some WinZip features.
Installing
If you have not already installed WinZip for Windows 8, you can open the Windows Store, swipe left (or move your cursor to the bottom right corner), tap or click the Search charm, and search for WinZip. In the results, you will want to choose the one that looks like the graphic at the top of this article. You can also use this link to the Windows Store.
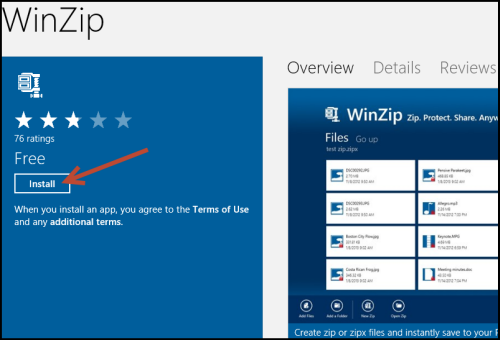
After you tap or click Install, WinZip will be available for you to use freely for the evaluation period (15 days). At the end of the evaluation period, if you wish to continue using WinZip, you will need to tap or click Subscribe in Settings. The subscription period is one year.
Overview and Settings
Before using WinZip, you may want to configure settings to make certain that the results you receive are what you would expect. To configure settings, open WinZip, swipe left (or move your cursor to the bottom right corner), and tap or click the Settings charm.
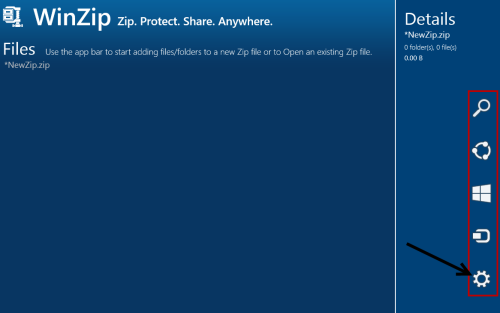
This will open the WinZip Settings panel, which will give you information and configuration options.
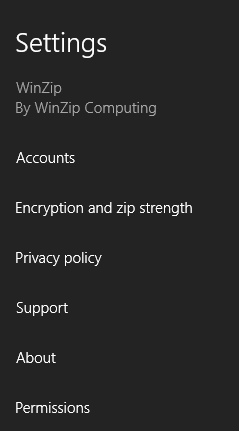
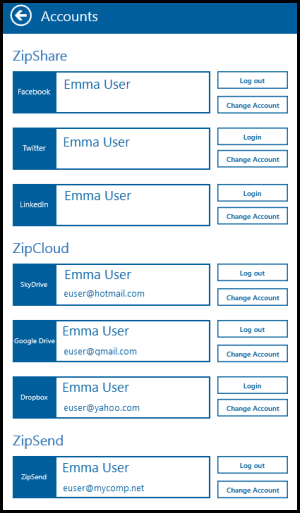
- Accounts: Set up or edit social media accounts and cloud services accounts (ZipSend is no longer supported)
- Encryption and zip strength: Set the encryption strength and the zip strength to be used when you create Zip files (more below)
- Privacy policy: Tap or click this to open the current WinZip Privacy Policy web page
- Support: Tap or click this to open the WinZip Knowledge Base page, which can be used for technical support
- About: Display the About WinZip for Windows 8 panel showing the version and copyright
- Permissions: Edit the permissions you will or will not allow for WinZip
You might want to use the Encryption and zip strength panel regularly.
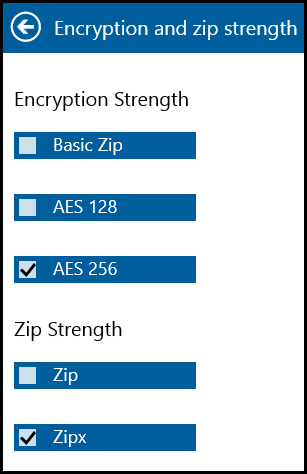
For help deciding which encryption strength to use, see KB 125900 and KB 125902 and consider who will use your Zip file. Before setting your default zip strength, you should know that:
- Zip is faster and compatible with nearly any Zip file utility
- Zipx will compress your files more, including JPG files
Note: This is a reference picture for multiple sections below

Create a new Zip
- Right-click or sweep up the app bar
- Tap or click Add Files or Add a Folder and then choose whether it will be from your PC or from a cloud service
- Use Go up and folder names as needed to locate the files or folders you want to zip
- Files: Tap or click the files you want to zip; they will show with a check mark. Then tap or click Add Files.
Folders: Open the folder you want to add and then tap or click Select a Folder; you will then see that folder listed (as below) and you can tap or click OK
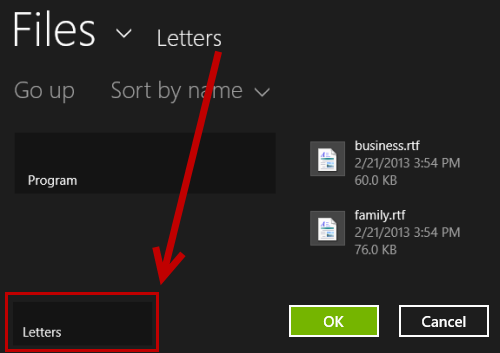
- Tap or click Save when you are done adding
- Choose whether to save to your PC or a cloud service and locate where to save the file
- Type a name and tap or click Save
Open an existing Zip
- Right-click or sweep up the app bar
- Tap or click Open Zip and then choose whether it will be from your PC or from a cloud service
- Use Go up and folder names as needed to locate the Zip file you wish to open
- Tap or click your Zip file and then tap or click Open
From your open Zip file, you can tap or click on a file to temporarily open it and display its contents. You can also choose to Unzip All of the Zip file contents.
Add files to an existing Zip
- Follow the steps above to open an existing Zip
- Tap or click Add Files or Add a Folder and choose PC or a cloud service
- Files: Tap or click the files you want to zip; they will show with a check mark. Then tap or click Add Files.
Folders: Open the folder you want to add and then tap or click Select a Folder; then tap or click OK - Tap or click Save or Save As to finalize your changed Zip file
Unzip the contents of a Zip
- Follow the steps to open an existing Zip
- To temporarily unzip a file and view its contents, tap or click the file in your open Zip file
- To unzip all of your Zip file contents:
- Right-click or sweep up the app bar
- Tap or click Unzip All
- Choose whether to unzip to your PC or a cloud service and locate the target location you want for your unzipped files
- After opening your desired target folder, tap or click Select a Folder
- Tap or click OK
If the contents of your Zip file have been encrypted, you will be prompted to enter the password before unzipping will occur.
Using Encryption
- Before encrypting files you zip, you should tap or click the Settings charm to "fine tune" your encryption strength
- Tap or click New Zip on the app bar
- Check the Encrypt files as they are added box before you add files or folders
- Follow the steps to create a new Zip file
- When prompted, type and confirm a password
- Tap or click OK
When opening a single, encrypted file in a Zip file or when you unzip all the contents of an encrypted Zip file, you will be prompted for the password.
Sending large files
The ZipSend feature is no longer supported.
Working with cloud services
Supported cloud services are shown and available when you select:
- Add Files
- Add a Folder
- Open Zip
- Unzip All
- Save or Save As
After selecting the cloud service you wish to use, follow the login instructions that display. Once your login has been entered and accepted, WinZip will remember it for you. The next time you choose to use the same cloud service, you will not need to log in.
You can easily manage all your cloud services and social media credentials from one convenient location. Simply tap or click the Settings charm, select Accounts, and input/update your ID's and passwords.
Sharing a Zip to social media
- Open or create a new zip
- Right-click or sweep up the app bar
- Tap or click ZipShare
- Use the check boxes in the right panel to make your Share To choice(s)
- Type a message to post (if no message is typed, the default "...has files to share with you" will be used
- Tap or click Share
- Follow the login instructions that display; this information will be saved and you will not have to enter it the next time you use this ZipShare account
- Your post, complete with a link to your uploaded file, will display in the account(s) you selected under Share To
Was this article helpful?
Tell us how we can improve it.