Keyframing is the ability to change parameter values for added effects smoothly within a video clip. This increases the range of possibilities for using effects in projects. Studiohas the ability to use keyframes with RTFX plugins. You can set different keyframes as often as you like throughout a clip. Each keyframe can have new sets of parameters. Between each keyframe, numeric parameter values are automatically adjusted to adjust from frame to frame to connect the keyframe values smoothly. Keyframing for RTFX plugins can be activated by checking the Use Keyframes box in the lower left of the effect properties window.
Here is an example of how you might want to use keyframing. Take a 15 second long video clip with a Blur effect applied to it. Maybe you dont want the amount of blur to be consistent throughout the whole clip. With keyframing you can set reference points throughout the clip with different amounts of blur at each point. For this example lets say there are 4 keyframe points set.
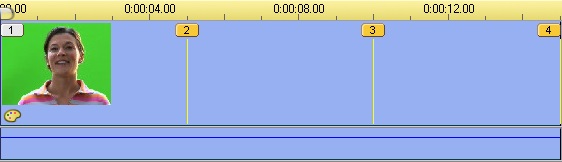
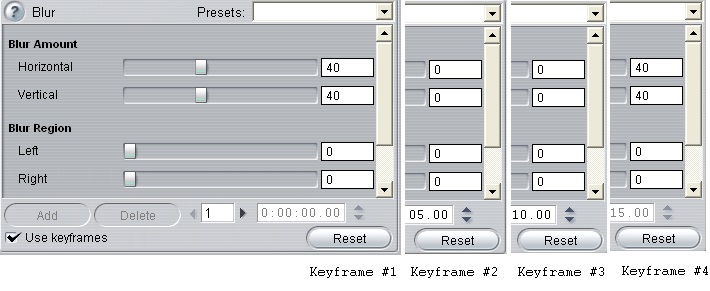
1st keyframe at 00.00A lot of blur
2nd keyframe at 05.00No blur
3rd keyframe at 10.00No blur
4th keyframe at 15.00A lot of blur
Here is how it would look on the timeline:
In this example from 00.00 to 05.00 the clip would start out with a lot of blur and gradually change so that there is no blur at 05.00. There would continue to be no blur until 10.00 where the blur would gradually increase until it reaches the parameters set at 15.00.
Here is how the plugin properties would appear at each keyframe:
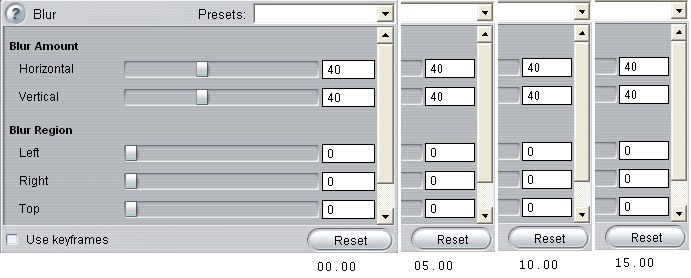
Without using keyframes, the parameters for Studio video effects are ordinarily applied at the first frame of the video clip and continue unchanged until its end. Here is how the above example would look if keyframes were not used:
Was this article helpful?
Tell us how we can improve it.