
PaintShop Pro offers a variety of ways to create stunning images and enhance your photos. The Picture Tube tool allows you to stamp a graphic onto your image with a single click, or even spray a number of graphics to create a streamer effect. For example,you can place butterflies and beetles over a picnic setting, or frame a picture with a stream of flowers. PaintShop Pro offers a collection of Picture Tubes, but also allows you to create your own.
In this tutorial, you will learn how to create custom Picture Tubes that you can use to enhance your photos. Let's get started!
Step 1 - Gather Your Materials
- In this example I'll be using spring flowers as a theme.
- Choose a group of photos in which the object you want to turn into a Picture Tube stands out from its background; this way it will be easy to separate or remove the objects.

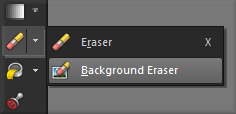
Step 2 - Remove Background
- Use the Background Eraser tool from the Tools Toolbar to remove the background. For more information on the Background Eraser tool, check out our tutorial on Background Removal with Fine Detail.
- Click and move the Background Eraser tool on the background of the image until it is completely removed.
- You can adjust the size of the Background Eraser tool in the Tools Options palette for small areas such as the space in between the petals of the flower.
- Zoom in to ensure that the background, including in smaller areas of the photo, is completely removed.
- Repeat these steps for the remainder of the images.
Step 3 - Combine Images
- Once you have removed the background on all the images that you will be using for your Picture Tube, it's now time to combine them. Start by creating a new PaintShop Pro image by clicking File > New.
- Next, set the following options:
1. Image Dimension - set the width and height of the canvas or image. This will determine the total number of Picture Tubes in the image. For this example, set the Width to 600 pixels and Height to 400 pixels.
2. Image Characteristics - select Raster Background as the layer type; Color depth of either 8 bits/channel or 16 bits/channel and enable the Transparent check box.
- Open the images you'll be using for the Picture Tube. Select an image using the Pick tool from the Tools tool bar.
- While the image is selected, press Ctrl C on your keyboard to copy and then press Ctrl V to paste the image to the new blank PaintShop Pro image you created earlier. You can resize the image by clicking and dragging the small box or the handle around the image.
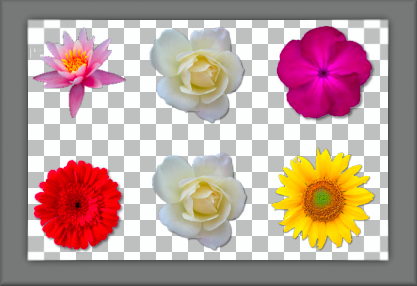
- Repeat these steps until you have copied all of your images onto the new document. Position the images across the canvas and make sure that the images have equal spaces in between.
- In the Layers Palette, right-click a layer and select Merge > Visible to create one Raster Layer.
Step 4 - Export as PSPTube
- To save your project, click File > Export > Picture Tube.
- In the Export Picture Tube dialog box, set the following options:
1. Cell arrangement - enter the number of cells across and down. Set the value of these fields to match the arrangement of images. In this example, the Cells Across field will be set to 3 and the Cell Down field to 2. The Total Cells field will then match the number of images placed in the tube file.
2. Placement options - just select the default options for this Picture Tube as you can change these options when applying the Picture Tube.
3. Tube name - enter the file name of the Picture Tube.
- Click OK
Step 5 - Using Picture Tubes
- Open an image in PaintShop Pro and click on the Picture Tube tool.
- From the tool options palette, click the drop-down list and select the Picture Tube you have created from the list.
- You can also change the size of the Picture Tube in the Tool Options Palette.
- To use the Picture Tube like a rubber stamp, click once on the image and a random graphic will be placed.
- To create a streamer of continuous graphics, hold down the left mouse button and drag the cursor around the image. This can be a fun way to create a custom picture frame.

If you have enjoyed this tutorial, be sure to check out the other tutorials that are available in the Discovery Center. If you have any ideas for tutorials or projects that you would like to see in the future, please leave us some Feedback."
Was this article helpful?
Tell us how we can improve it.