Your Roxio Easy VHS to DVD software not only allows you to burn captured VHS videos to DVD, it can also convert those captured videos to other video formats and saved to your hard drive, to be played on your computer, or uploaded for streaming or sharing over the Internet.
Exporting your recordings
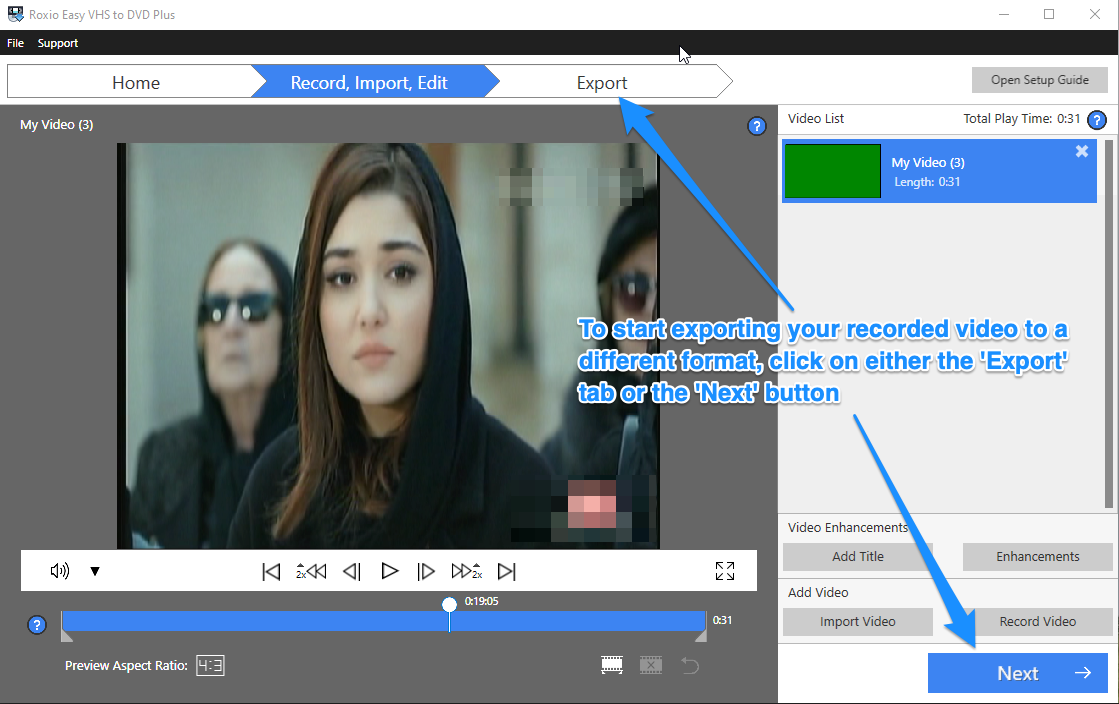
Once you are done recording and trimming your video, you can click on the "Export" tab, located at the top area of the user interface, or the "Next" button at the bottom right-corner.

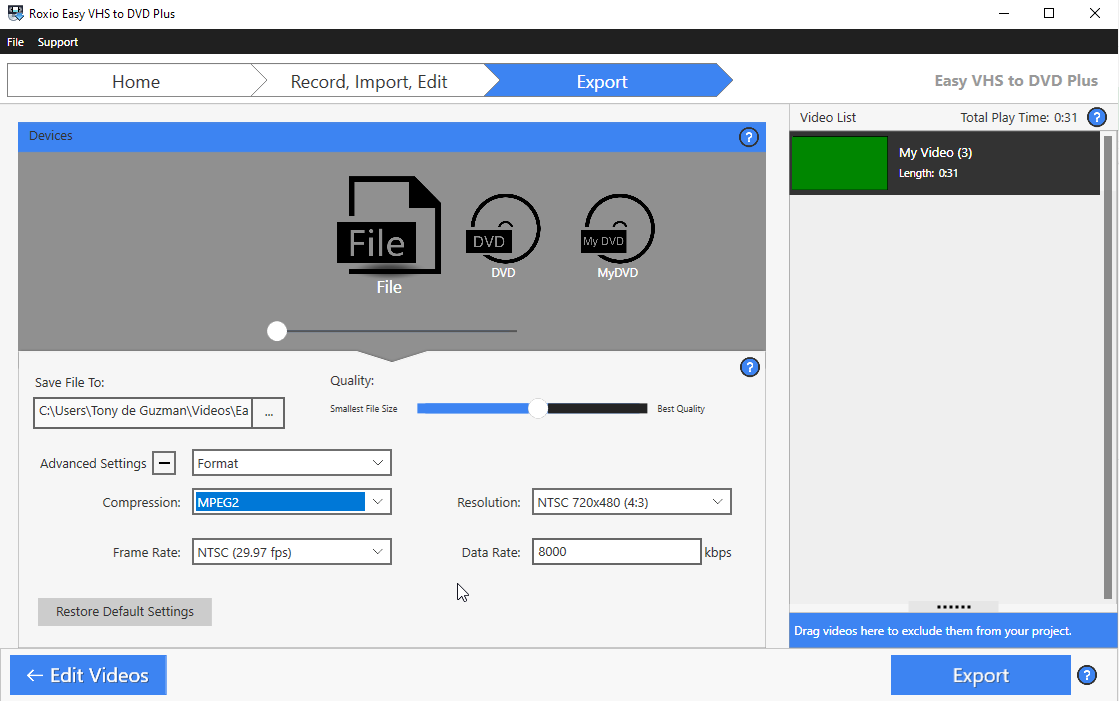
This will bring you to the Export workspace, where you can choose the different format settings to be used for converting your video.
The Device Profile Selector
Your first step in exporting your video is to select the device profile. As you will be converting your captured video to a different format (and not burning it to DVD), select "File" from the device profile selector window.

The Save File Destination
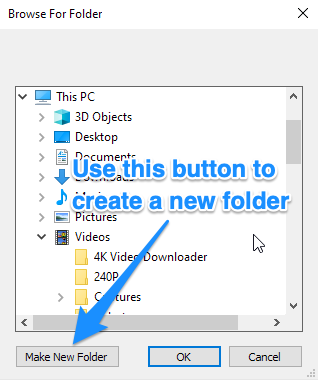
After selecting your device profile, you will need to set its save destination. This is the folder location where the converted video will be exported to.

Clicking on the ellipsis button will bring up the Browse window. Here you can navigate to and select a pre-existing folder, or you can make a new one.

Export Quality
Use the Quality slider to adjust video quality.

Moving the slider to the right improves the quality and increases the file size. Advanced Settings affect the Quality setting, so recheck Quality if you make other setting changes.
Advanced Settings
This is where you choose all the different format settings for your video.

Click on the plus (+) button to expand window and see all the available settings to choose from.

Below is a rundown of the different options available in the Advanced Settings area.
- Format/Extension: Choose between a format or a file extension. This setting affects the options in the Compression drop-down list.
- Compression: Select a codec to compress and decompress the video file. Three compression formats, WMV, MPEG2, and H.264 are available when Format is selected. If you selected Extension, you can choose from .wmv, .mp4, or .mpg.
- Frame Rate: Higher frame rates yield better quality and smoother motion, but larger file sizes. NTSC-compatible frame rates are 29.97 and 30 fps, while PAL typically uses 25 fps. For mobile devices, it is common to output video in a lower frame rate to decrease file size. NTSC is used in North America and Japan. PAL is used in most parts of Europe and Brazil.
- Resolution: Select the size, in pixels, that you want the video clip to occupy on the screen. The available frame sizes vary depending on the export format/extension. A smaller frame size (such as 480 x 270) plays in a smaller window, with lower quality than a higher frame size (such as 720 x 480). However, using a higher frame size is likely to increase video file size. You will not benefit from setting a larger resolution than the display screen supports.
- Data Rate: Data Rate represents the amount of information that is stored per unit of time. A higher data rate means less compression, better quality, and a larger file. A lower data rate results in more compression and a smaller file.
Exporting your video
Once you have selected your compression method, the video frame rate, resolution, and data rate, you can then proceed to execute the convert and export process by clicking on the "Export" button at the bottom right-hand corner of the application window.

As mentioned before, do keep in mind the higher the values you select for the export settings, although they make for a very good quality video, the bigger its file size will be as well. So it is best to strike a good balance between quality and file size.
Was this article helpful?
Tell us how we can improve it.